|
|||||||
| Home | Forum | Online Store | Information | LJ Webcam | Gallery | Register | FAQ | Community | Calendar | Today's Posts | Search |
 |
|
|
Thread Tools | Display Modes |
|
|
 06-08-2012, 07:09 AM
|
#1 |
|
Senior Member

Join Date: Jun 2010
Location: Alhambra
Posts: 506
|
thats pretty thrifty of you to use the pvc that way. if you paint it black it would look more factory.

|

|

|
|
06-09-2012, 07:50 PM
|
#2 |
|
Member
Join Date: Feb 2012
Location: San Diego, CA
Posts: 30
|
I use a pump-type garden sprayer to wash sand off the kayak be loading on my SUV. Also can be used to washdown rods and reels, etc.
Lots of great ideas here...Thanks |
|
|
|
|
06-10-2012, 06:23 AM
|
#3 |
|
Senior Member
Join Date: Mar 2012
Location: Utah
Posts: 138
|
I originally posted this in the general forum, but decided to duplicate it here so it wouldn't scroll off into oblivion...
Hobie Pro Angler-14 Simple Seat Riser Mod For you Pro Angler-14 owners: I wanted a higher seat in my PA14, for a better leg angle while pedaling, and for general comfort. It would also allow my old bones to stand up easier! Here's what I built, in rough state but fitted together. After a trial or two on the water, I'll round the edges with a router and then sand and finish it. Parts List: One 32" length of 2x4 (I used a piece of fir with straight grain) Four 1/4" x 1½" galvanized cap-head bolts Two 1/4" x 3" bolts Two 1/4" x 4" bolts Four 1/4" nuts and eight washers Cut the 2x4 into two 16" pieces. Mark the bolt hole locations. Using a hole saw, drill two 1½" holes through the sides of each riser, centered. Drill four 5/16" bolt holes from top and bottom, into the large holes. Assemble. Attach the risers to the seat using four 1½" bolts and washers. Attach the aluminum base using the 4" and 3" bolts, with washers and nuts. Here are the risers attached to the base, for clarity. (I trimmed the riser ends at 45° for a better look.) 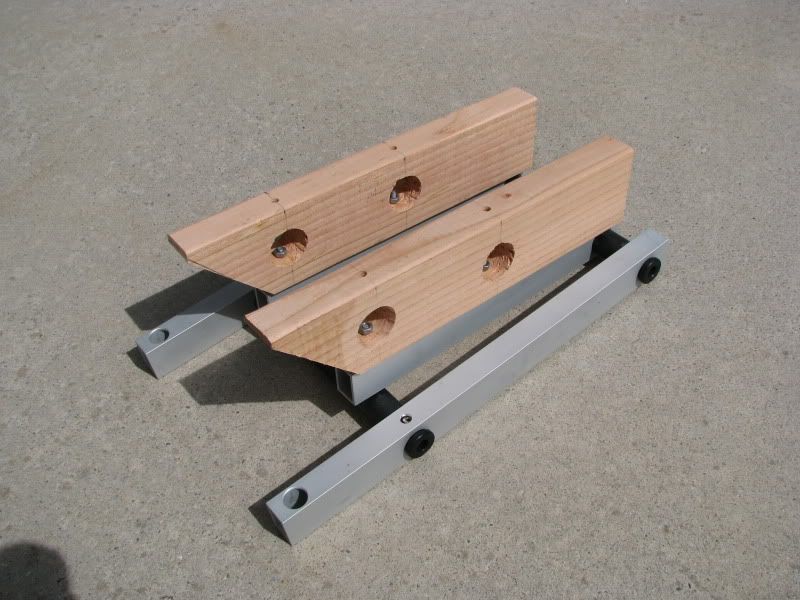 Here's the seat and base, upside-down 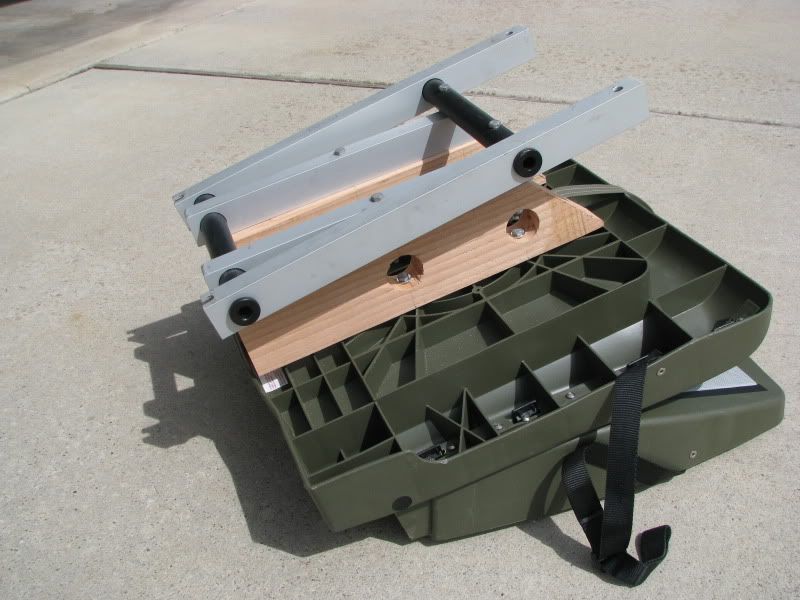 Here's the assembled unit from the side 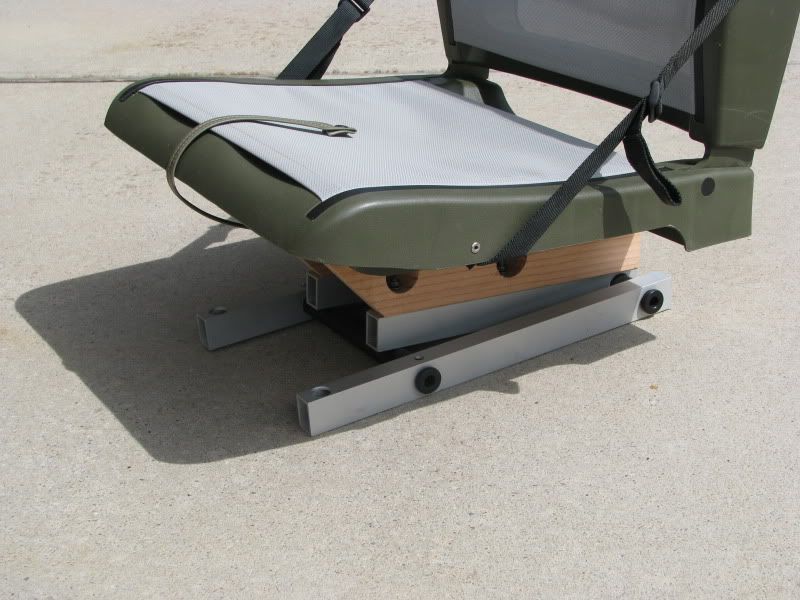 And from the front 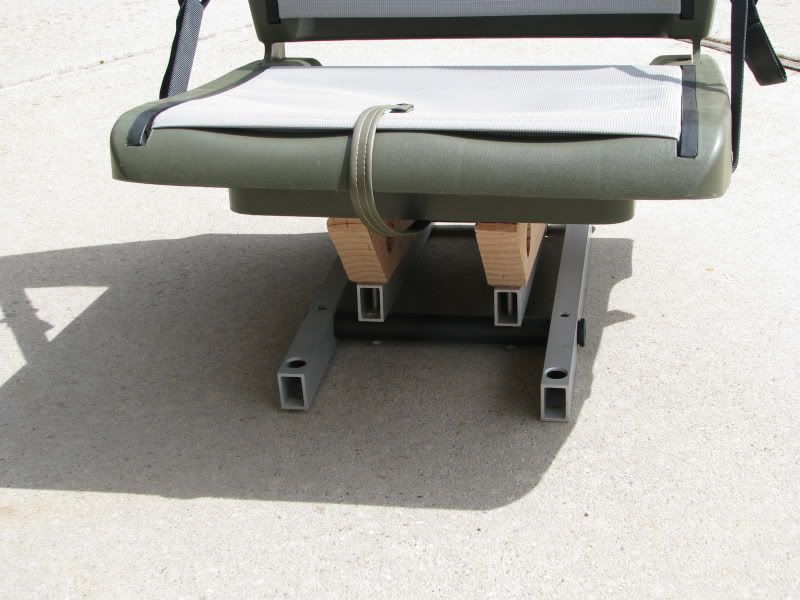 Note the added storage room, too! Total cost was about five dollars. Hard to beat that. |
|
|
|
|
06-13-2012, 03:05 PM
|
#4 |
|
Senior Member
Join Date: Mar 2012
Location: Utah
Posts: 138
|
Finally got the boat out today to test that seat mod.
Folks, it's magic. My leg angle from hips to pedals is MUCH improved. That means I'm no longer resting right on my tailbone the whole time. Discomfort and fatigue are drastically reduced. Now, I can take it apart and "purdy" it up some with rounded edges and some sealer and stain. I recommend this mod to anyone who owns a PA-14. |
|
|
|
|
06-18-2012, 05:30 PM
|
#5 |
|
Member

Join Date: Jun 2012
Location: Port Hueneme CA.
Posts: 35
|
Hello
I like to post these links on a few items that may help you folks on your bait tanks. Just check your local Aquarium shop for them. http://www.drsfostersmith.com/produc...93&pcatid=3693 http://www.drsfostersmith.com/produc...76&pcatid=4076 http://www.drsfostersmith.com/produc...99&pcatid=8999 http://www.drsfostersmith.com/produc...80&pcatid=4080 https://www.strapworks.com/default.asp The last link is a company that carries Tubular Webbing for rod leashs Cheers Saba  |
|
|
|
|
| Tags |
| kayak fishing inovations, kayak rigging ideas |
|
|


 Hybrid Mode
