|
|||||||
| Home | Forum | Online Store | Information | LJ Webcam | Gallery | Register | FAQ | Community | Calendar | Today's Posts | Search |
 |
|
|
Thread Tools | Display Modes |
 05-25-2014, 10:24 AM
|
#521 |
|
LOWSPARK

Join Date: Dec 2013
Location: CARLSBAD
Posts: 251
|
hope for the best,plan for the worst
|

|

|
|
05-25-2014, 10:46 AM
|
#522 |
|
LOWSPARK
Join Date: Dec 2013
Location: CARLSBAD
Posts: 251
|
OLD GUYS RULE !
I'll be the first to admit that I need to lose weight. BUT in the mean time I have to fish! So as I was shopping around for my first kayak I found some really neat things on some kayaks. Each different mfgr. has it's own cool factor.The one that really struck me as a required tool is the assist leash in the jackson kayaks. If you haven't seen it, it's attached in front of where you sit and if you want to get something from the front hatch or stand up and stretch your legs, you just grab it and you can use your arms to help you stand or get from sitting to your knees very easily. So I rigged a super cheap easy one for my PA14. I used a 1/2" inch sch. 40 pvc nipple( I think it was just long enough to rise out of the sail socket by 2")then put a cap on it and I heated it with a torch just enough to soften it and put a slight bend in it(maybe one or two degrees)so when you drop it in the sail socket it has a bit of resistance(because it's crooked and the socket is straight).Then I spliced some 1/2" poly rope to make the leash. Very easy and when you don't need it in there you just pull it out and throw it on the work bench, no harm to the PA.
|
|
|
|
|
05-25-2014, 10:08 PM
|
#523 | |
|
Senior Member

Join Date: Apr 2010
Posts: 6,856
|
Quote:
__________________
 www.facebook.com/Teamsewer Last edited by jorluivil; 11-12-2014 at 07:05 PM. |
|
|
|
|
|
05-25-2014, 10:17 PM
|
#524 | |
|
Senior Member
Join Date: Apr 2010
Posts: 6,856
|
Quote:
I did something very similar and had such bad results that I decided to leave it as it was built. The problem with this idea is that now every little piece of trash, weed, grass, etc. that could have simply run through the tube past the impeller and into the tank will be help up at the screen. One piece will turn into two, two into three and so on and so forth and before you know....BLOCKAGE  Again, its a great design/idea but the reality is that it will only work until small particles start to jam up against the screen. I'm speaking from experience and nothing else. I've got a few things that I'm working on to help prevent weeds and crap from being sucked into the pump...........I'll peep you posted.
__________________
www.facebook.com/Teamsewer |
|
|
|
|
|
05-26-2014, 09:59 AM
|
#525 | |
|
Senior Member

Join Date: Dec 2011
Location: Oceanside
Posts: 197
|
Quote:
|
|
|
|
|
|
06-11-2014, 07:04 AM
|
#526 |
|
Senior Member

Join Date: Aug 2011
Location: West Covina, CA
Posts: 434
|
Found this baby cup holder to be very useful for any kayaker or proangler owner. The clamps open about 3inch max and has a powerful rubberize clamping. Not to mention it's plastic so no rust to worry about. It comes with 2 cup holder and a twist know to tighten the clamp to a bar handle or any part of the kayak that is less than 3inch. For $7 it's cheap and can be your great add on to any kayak that need drink holder.
Here's an example. Last edited by Rambo; 07-07-2014 at 06:53 PM. |
|
|
|
|
06-11-2014, 08:20 AM
|
#527 | |
|
kayak fishing socal

Join Date: Nov 2013
Location: Southern California / Whittier
Posts: 438
|
Quote:
Sent from my SAMSUNG-SGH-I537 using Tapatalk |
|
|
|
|
|
06-11-2014, 11:58 AM
|
#528 | |
|
Rookie of the Month Club

Join Date: Nov 2008
Location: Mira Mesa
Posts: 483
|
Quote:
__________________
they are getting bigger.... 
|
|
|
|
|
|
06-24-2014, 11:21 PM
|
#529 |
|
Senior Member
Join Date: Aug 2011
Location: West Covina, CA
Posts: 434
|
Adjustable DIY heavy duty cart Hobie revise
Here's a DIY for anyone that wants scupper adjustable plug in cart with the ability to exchange any wheels to haul their kayak on the beach or terrains.
Equipment needed (home depot) QTY: Material Price 1 3/4 in. x 10 ft. Electric Metallic Tube Conduit 3.64 1 5/8x11 by 24 inch length threaded rod stainless steel 4.54 1 5/8x11 by 36 inch lenght threaded rod stainless steel 6.98 8 5/8x11 nut 8 x 0.35 = 2.80 8 3/4 washer 8 x 0.40 = 3.20 2 10-1/2 in. x 3-1/3 in. Flat-Free Tire for Hand Trucks (300lbs payload per wheel) 2 x 24.99 Total Price = 71.16 before tax Finish product 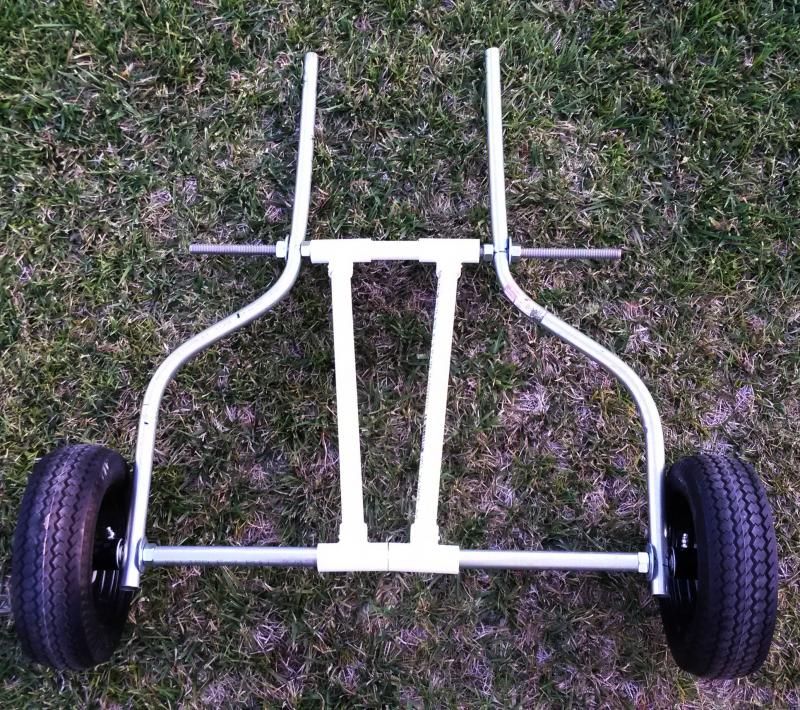 Cut the pipes into 36" Then use pipe bender to bend to 45 degrees, I mark about 8.25inch from the bottom of my 36" pipe to start my first bend. then 16.30" for the 2nd bend. This allows for my 11 1/2" gap for the scupper plug with my 36" 5/8" threaded rod. 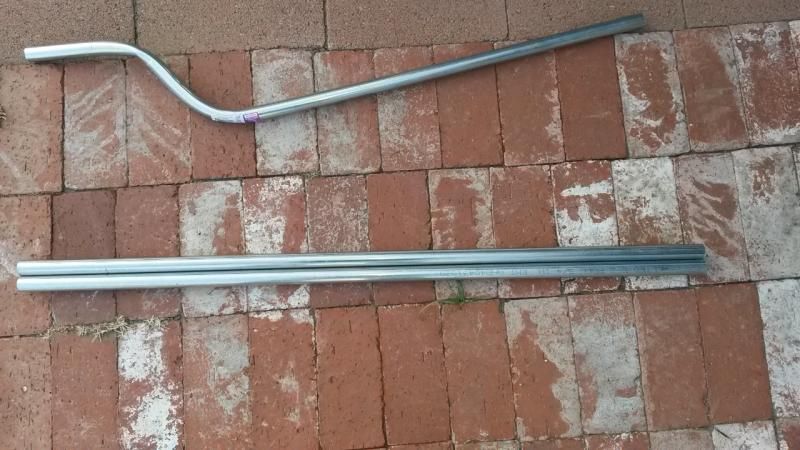 Use a center punch to start my drill place, and after that, start with my small drill bit and step step to drill my to my 5/8 hole diameter. 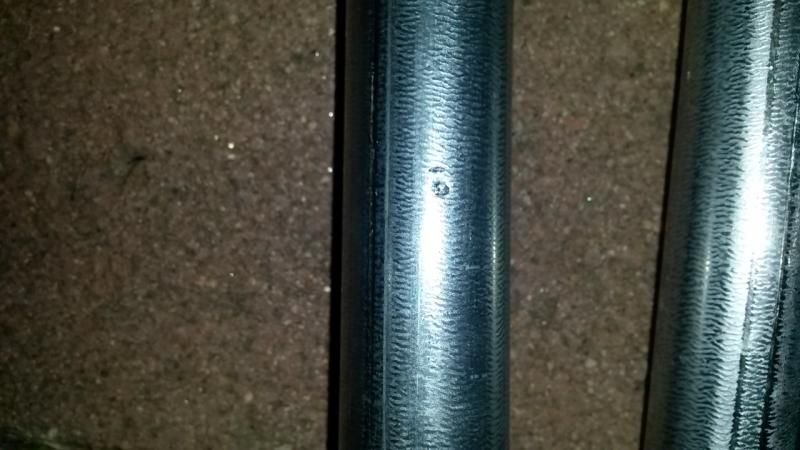 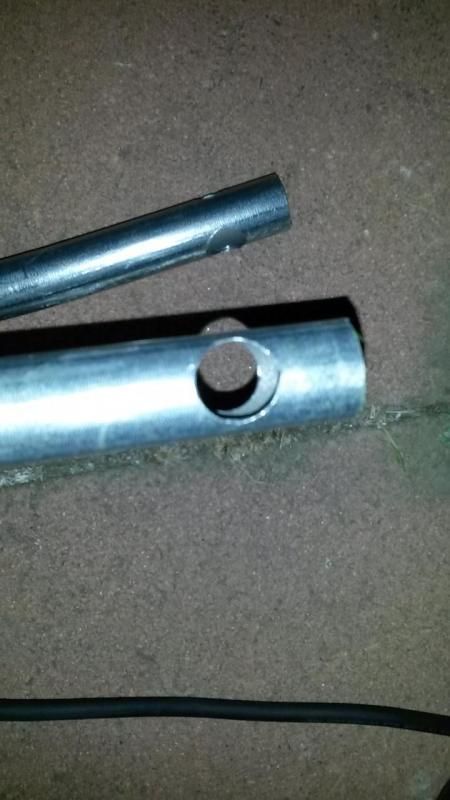 Then I test the assembly after drilling all my holes for the wheel axle and the supporting/resting bar. 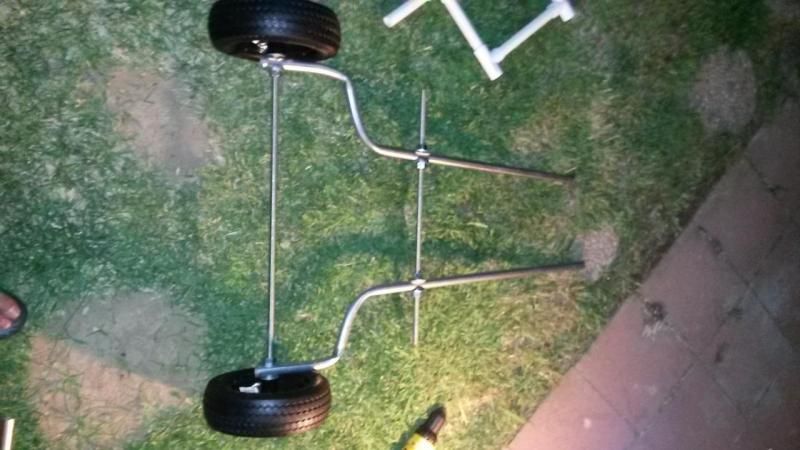 http://i142.photobucket.com/albums/r...ps45787f78.jpg With the left over 40" pipe I trim it down t 24" and added it as a sleeve to help distribute the load over the axle in case it bows. 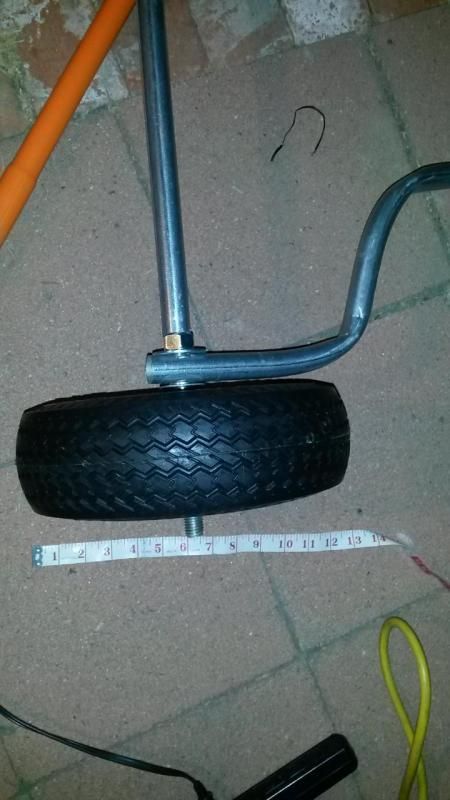 Also, in case I need to change out the wheels for beach wheels, its easy to just unscrew and place the beach wheels due to my long thread. 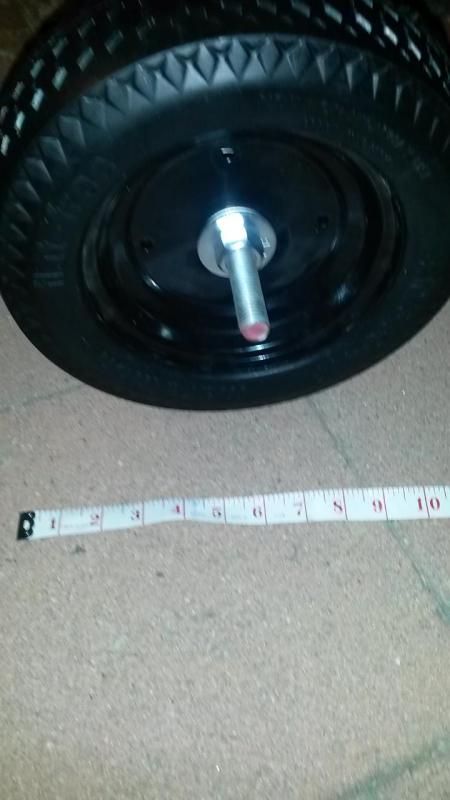 It's my 1st attempt at pipe bending. I'll be adding some PVC/pool noodle to top supporting rod to minimize any scruff mark on the kayak. Last edited by Rambo; 07-24-2014 at 10:45 PM. |
|
|
|
|
06-25-2014, 05:41 AM
|
#530 |
|
Large Member
Join Date: Jul 2012
Location: La Verne, CA
Posts: 1,011
|
Just some helpful criticism. The Wheel on the left will always work loose since it's spinning ccw. The pinched bends probably reduced your weight capacity quite a bit.
|
|
|
|
|
07-03-2014, 09:53 PM
|
#531 | |
|
Senior Member

Join Date: Jul 2013
Location: San Diego
Posts: 149
|
Quote:
Sent from my ADR6350 using Tapatalk 2
__________________
2008 Olive Hobie Revolution 13 |
|
|
|
|
|
07-03-2014, 11:07 PM
|
#532 | |
|
Senior Member
Join Date: Apr 2010
Posts: 6,856
|
Quote:
__________________
www.facebook.com/Teamsewer |
|
|
|
|
|
07-04-2014, 08:16 AM
|
#533 | |
|
Senior Member
Join Date: Jul 2013
Location: San Diego
Posts: 149
|
Quote:
Hell, the whole intake assemblies cost less than $8. You could carry two if it was giving you a lot of trouble. Although I agree that if you are going to put mesh over the intake, then the approach of putting it at the very front/outside, rather than an inch inside would probably be less likely to get blocked and easier to clean, although more work to install. One could probably use something like the stainless steel drain strainer at the bottom of the scupper, rather than in the intake. Maybe this is not really necessary. Are you suggesting that if the intake gets blocked it will burn out the pump? Otherwise, it does seem better to be safe than sorry. |
|
|
|
|
|
07-04-2014, 09:47 AM
|
#534 | |
|
Olivenhain Bob

Join Date: May 2008
Location: Olivenhain, CA
Posts: 1,122
|
Quote:
My approach is much simpler. Yes the screens get plugged up and there is not much you can do to prevent this. Rather than try to prevent this problem, I have discovered an easy and quick way to unplug a blockage. I keep a little piece of plastic pipe in my tank that easily fits into the intake hose inside my tank, (see photo). P1020503.jpg Whenever something gets plugged up, I simply insert the pipe in the hose and blow some air through the system. If you need to quickly prime the pump, just suck a little water back and you are good to go. Bob |
|
|
|
|
|
07-04-2014, 03:18 PM
|
#535 | |
|
Senior Member

Join Date: Sep 2010
Location: South OC
Posts: 1,606
|
simple fix....
Quote:
The nylon lint traps are the way to go. about $2 for two and a zip tie. no fuss, no worries, and more importantly no clogs. Another adjustment for the bait tank is an extension to the out-flow. This allows the tank to fill an additional 1-2 inches. I stow it in the bait tank. When I need more water in the tank I slide it on. |
|
|
|
|
|
07-09-2014, 01:29 PM
|
#536 |
|
Senior Member
Join Date: Mar 2012
Location: Utah
Posts: 138
|
After fishing, I generally pull down to the end of the ramp rather than risk a heart attack pulling my loaded PA14 back to the lot. The PA slides easily onto my roof rack -- TOO easily. On a steeper than usual ramp once, it almost slid all the way off, onto my hood and then nosefirst onto the ramp. I also needed a way to protect the paint on my Highlander's spoiler. Here are my two solutions:
To protect the spoiler and help keep the PA from sliding off sideways, I glued ans screwed two short pieces of scrap 2x2 to an old cutting board (plywood woul work as well) and then bent two strips of steel strapping into squared-off hooks to slip around the rear crossbar. Here's that innovation: (Excuse the pre-dawn lighting)  Then, to keep the kayak from moving forward - or sideways in crosswinds - I cut another piece of wood into a tapered shape to loosely match the mirage drive well and bolted it to the front crossbar. 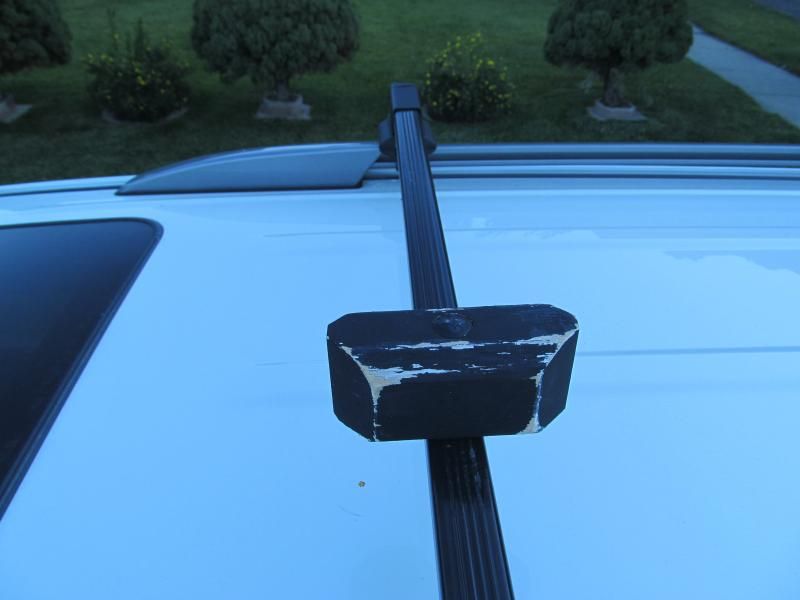 Now, I can rest the nose of the PA between the two cutting board guide rails, lift the stern and simply slide the 'yak forward until the drive hole drops onto the front safety block. I then remove the cutting board, tie the 'yak down with straps and two front ropes. 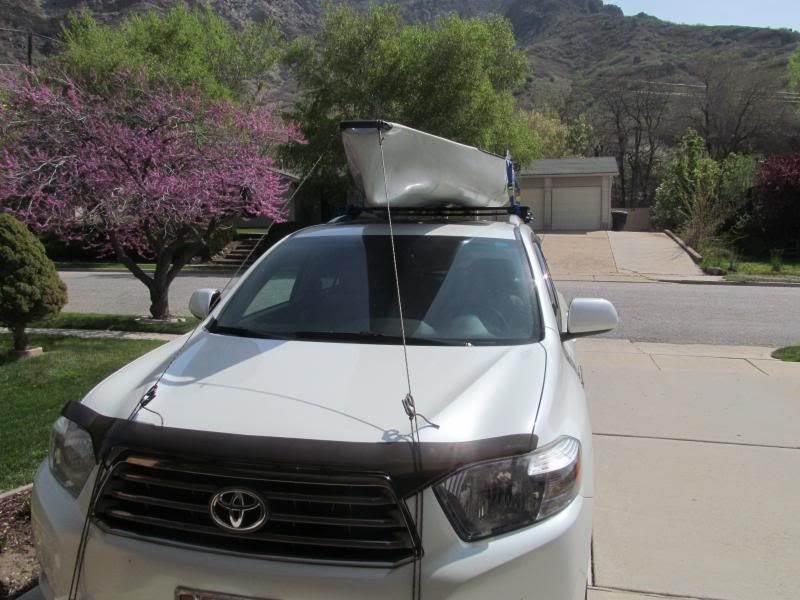 Voila! That PA isn't going anywhere! |
|
|
|
|
07-10-2014, 09:38 AM
|
#537 |
|
Senior Member
Join Date: Sep 2010
Location: South OC
Posts: 1,606
|
a picture's worth 1000 words.
|
|
|
|
|
07-11-2014, 10:16 AM
|
#538 |
|
I am just me.
Join Date: Jul 2011
Location: Lake Forest
Posts: 135
|
 Built a card to carry the yak and store my gear and others items. The nice thing is that it rolls around and move out of the way when I need it to and then when I lift the yak into rafters the foot print is not that big and I have another work table. Sent from my iPhone using Tapatalk |
|
|
|
|
07-11-2014, 11:49 AM
|
#539 | |
|
Senior Member
Join Date: Jun 2011
Location: Too far from the launch.
Posts: 443
|
Quote:
__________________

|
|
|
|
|
|
07-11-2014, 01:49 PM
|
#540 | |
|
Senior Member

Join Date: Apr 2011
Location: Menifee, CA
Posts: 1,475
|
Quote:
__________________
So long and thanks for all the fish... |
|
|
|
|
|
| Tags |
| kayak fishing inovations, kayak rigging ideas |
|
|


 Linear Mode

